Watercolour Painting Effect In Photoshop
Taken a great photo on holiday and want a great effect to do that photo justice? Then look no further than "the watercolour effect". It does exactly what it says on the tin, turning an ordinary photograph into a realistic looking watercolour painting. And best of all, it's super simple. Here's how to do it.
Step 1 - Download and Install Brushes
For this tutorial, we'll be using some custom watercolour brushes. You can download the brushes I used from or search for some others. To install the brush, copy the .abr file into the folder C:/Program Files/Adobe/Photoshop/Presets/Brushes (yours may vary depending on your operating system).
Step 2 - Create Canvas
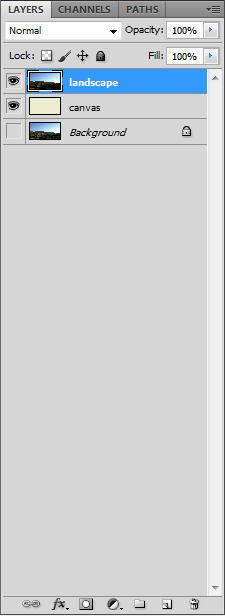
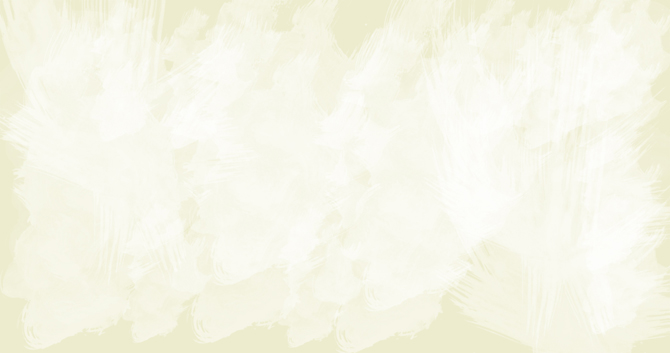
First things first, after you've opened your image, duplicate the layer in case something goes wrong, then you have something to fall back on. Call this layer landscape.Next, create a new layer and fill it with a colour of your choosing. For my canvas, I choose the colour #EDECCE. Place this layer underneath landscape and call this layer canvas.

Step 3 - Apply The Watercolour Filter
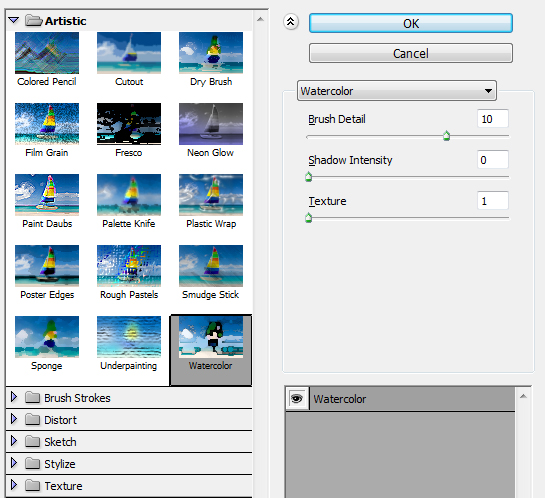
Select the landscape layer and go to Filters -> Artistic -> Watercolor. Adjust the settings to get the watercolour look that you want. For my image, I used Brush Details: 10, Shadow Intensity: 0, Texture: 1.
Step 4 - Masking The Photo
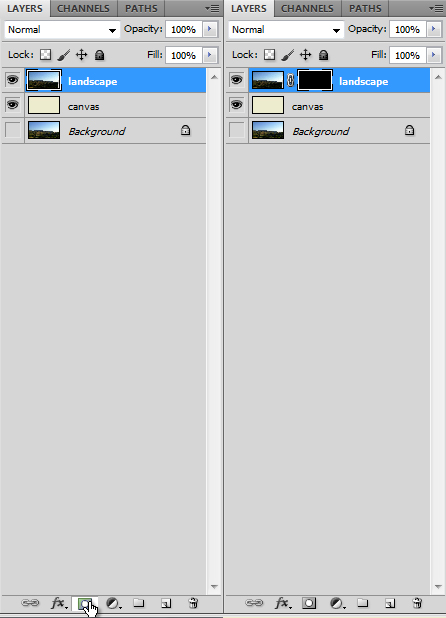
Next step is to add a mask to our landscape layer and invert the mask so our image disappears. We're going to be erasing this mask away later so don't worry that you can see anything.
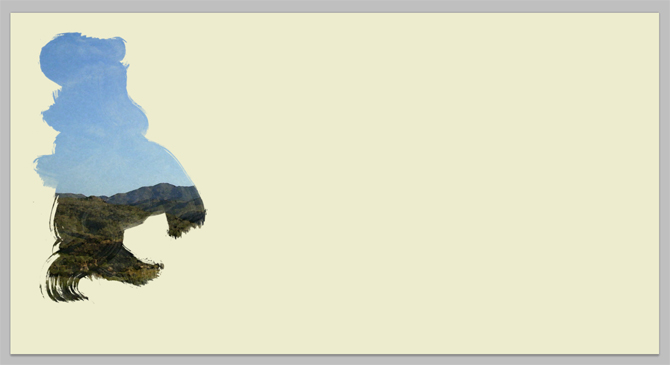
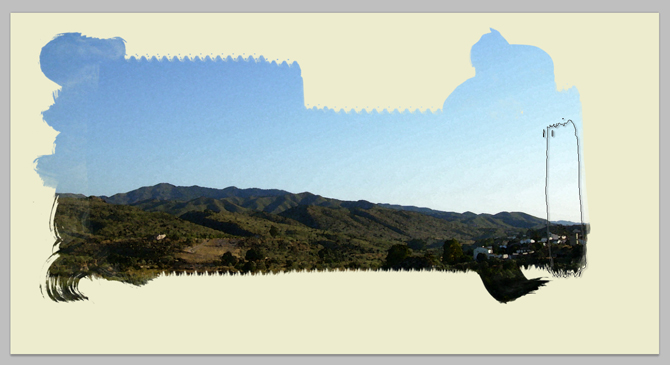
Step 5 - Painting Out The Mask
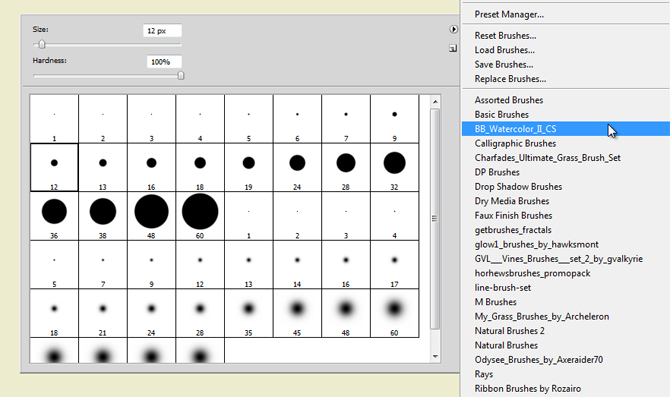
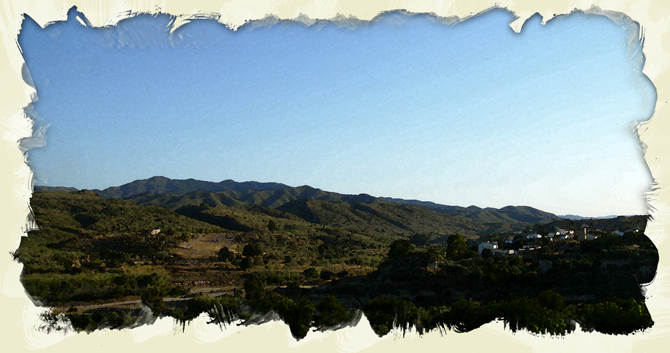
Start by selecting the brush tool and choose the watercolour brushes we imported earlier. Select one of the brushes, making sure that the primary colour is white, and start painting out the mask. Use a variety of brushes of different sizes to give that natural look. Make sure that none of the brush strokes go outside of the canvas. The objective of this is to make the image look like it's been painted on to a canvas, so keep the edges varied, try to avoid obvious repetition and experiment with the opacity of the brushes. Here's what it should look like.

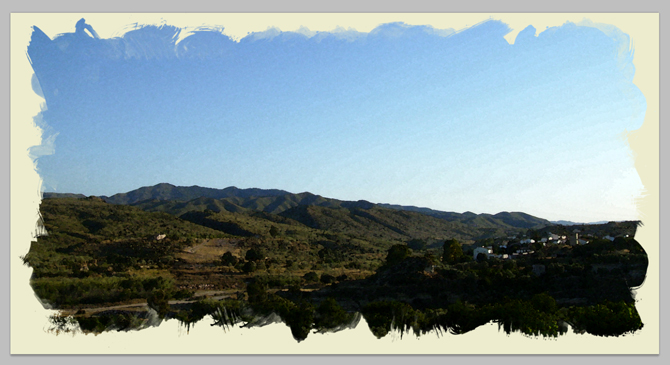
Step 6 - Optional Effects
And that's it, you have your watercolour painting!! So simple yet so effective.There are a couple of extra effects you can apply to enchance the iamge that bit more if you wish. Try getting a watercolour brush that is quite whispy. Select white as the primary colour and turn the opacity of the brush down. Then hide the landscape layer and paint some subtle brush strokes on the canvas. This will make it look like a white base has been washed over with white previously.

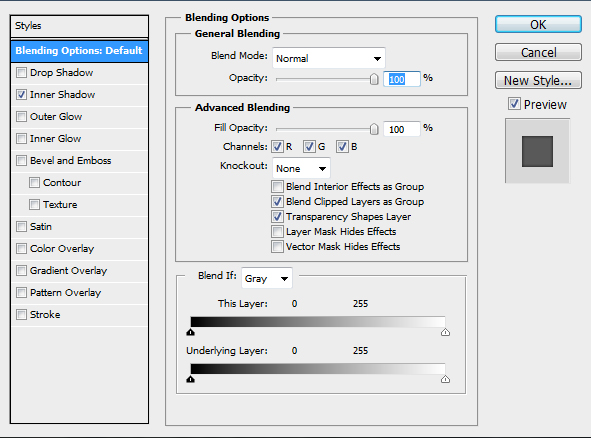
Another effect could be adding a inner-shadow, giving the photo a portal effect, making it look like you are viewing the water colour painting through a window of some sort.
Got any other effects that work well? Let me know...