Photoshop Tutorial - Using Levels
Editing the levels of a photo is a great and simple way to make everyday photos look fantastic. It only takes a few steps, so lets get started.
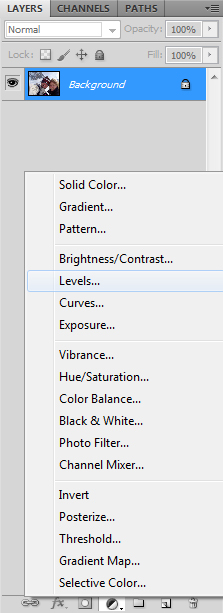
Step 1 - Add an adjustment layer
Start by adding the levels adjustment layer. Go to Layer > New Adjustment Layer > Levels or use the button at the bottom of the layers panel
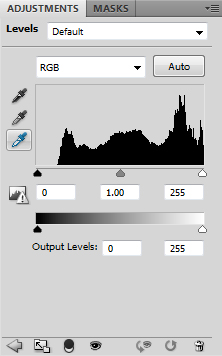
Step 2 - Edit the white balance
By clicking on the lowest eye dropper tool, you can edit the white balance of the image. Select a part of the image you know is actually white. In this case, the outer rim of the goggles are white so I selected those. You will see the image contrast change but don't worry if its too light. (Read more about white balance).
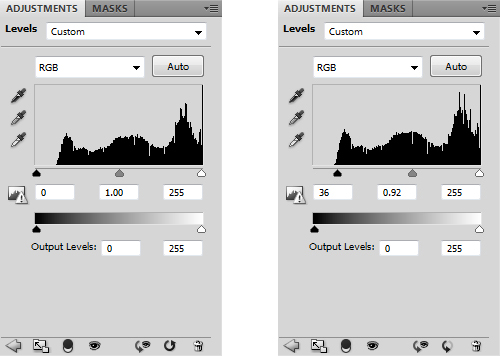
Step 3 - Adjust the levels
Now if you take a look at the levels histogram, you can see that there is a gap between the left of the graph and the black marker. Simply drag the black marker so that it reaches the start of the graph. This will strengthen the darker, black colours in the image, adding more contrast. Depending on your image, you may be shifting the white marker. Just make sure both the black and white marker are at either end of the graph. You can then play around with the middle, grey marker to make the image look how you want.
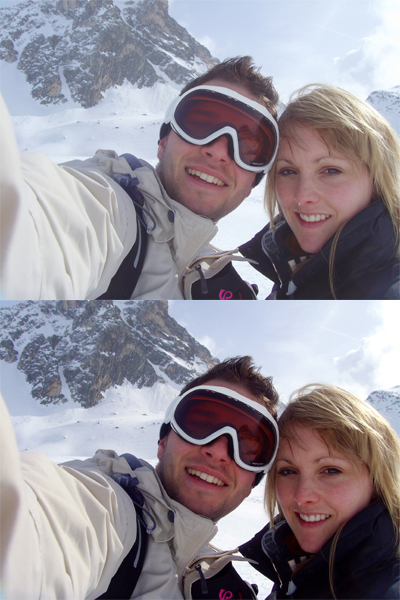
Step 4 - And that's it
There is nothing else to do now but sit back and admire the visible improvement.