Using Notepad++ As Your FTP Client
For many years now, I've been using FileZilla as my preferred choice of FTP client. For large batch uploads, there is no software better, but for making little changes to a live site or adding some extra content, FileZilla can start to frustrate. Constantly having to change windows to click "Yes" becomes a real annoyance, but not anymore. Not since I was introduced to Notepad++ and it's inbuilt FTP client - it makes editing files on a server so much easier. If you don't have Notepad++ installed as your default text editor then what are you doing with your life!! Go and download it straight away. Then follow these simple steps to begin editing files..
Step 1 - Open NppFTP Window
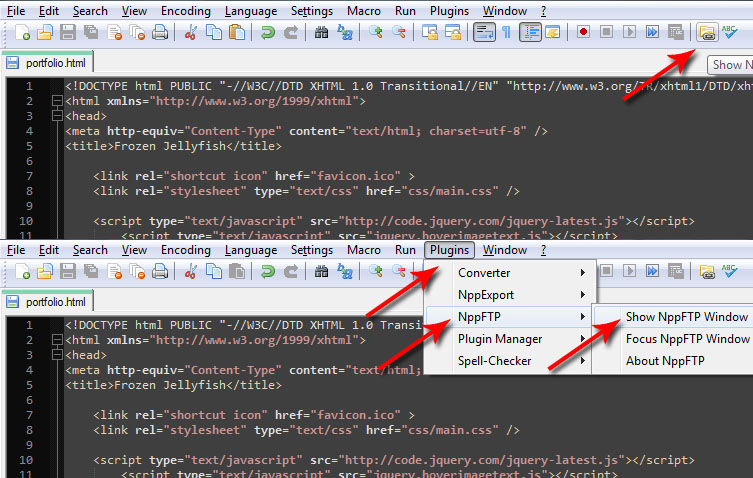
Start by opening the NppFTP client by clicking on the icon at the end of the toolbar. Or alternatively, go to Plugins -> NppFTP -> Show NppFTP Window
Step 2 - Enter Profile Settings
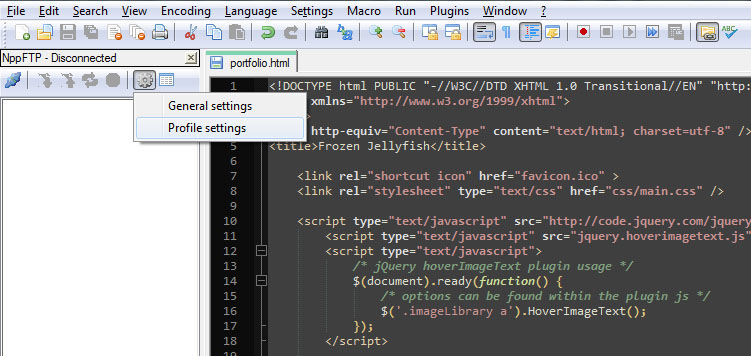
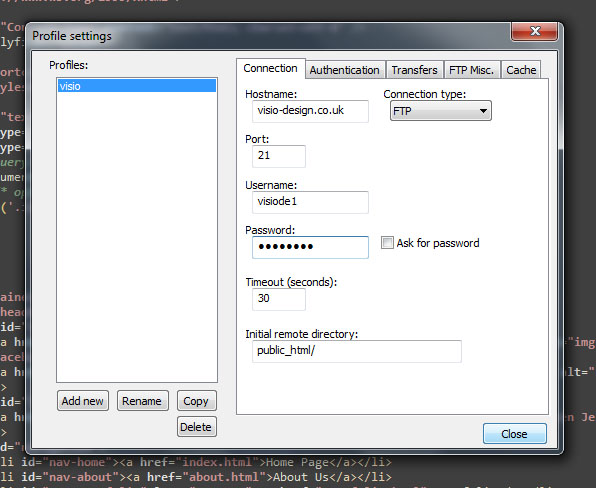
A new window will now be open. Start by clicking on the cog icon and selecting Profile Settings. Another window will popup asking for your FTP information. Enter your hostname, username and password and click OK.
Step 3 - Connect To Your Server
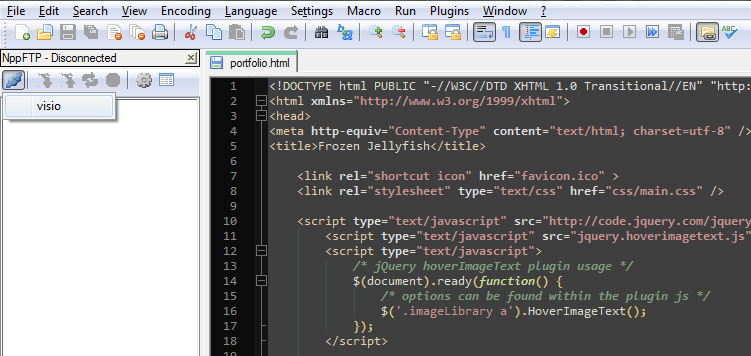
A new icon is now highlighted in the NppFTP window. Click on the connect icon and select which profile you want to use. In this case, I'm going to select visio.
Then start editing. Everytime you save that file, Notepad++ will automatically upload it to your server with no pop-up windows or OK buttons. Although I don't recommend you use this as your way to build and develop websites, it's an excellent way of quickly changing a file on your server. Enjoy!!