Photoshop Tutorial - Converting to Black and White Using The Channel Mixer
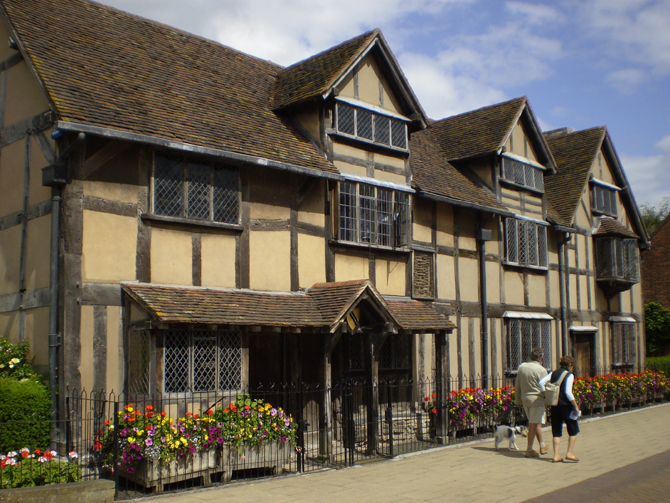
Adjustment layers are a great way to enhance an image. We've already looked at using the gradient map adjustment layer and how it can be used to change the tone of an image. Today we're going to take a look at the channel mixer adjustment layer. It's and an incredibly useful tool and can be used in a variety of ways. Today thought, I'm going to focus on using it to change a normal colour image to stunning black and white. For this tutorial, I'm going to be using a photo of Shakespeare's house. Let's get started...
Step 1 - Add adjustment layer
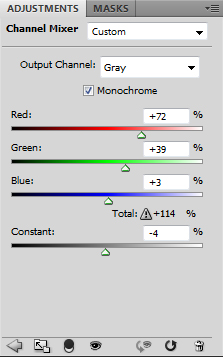
Start by applying a new channel mixer adjustment layer to your image and check to box named Monochrome.
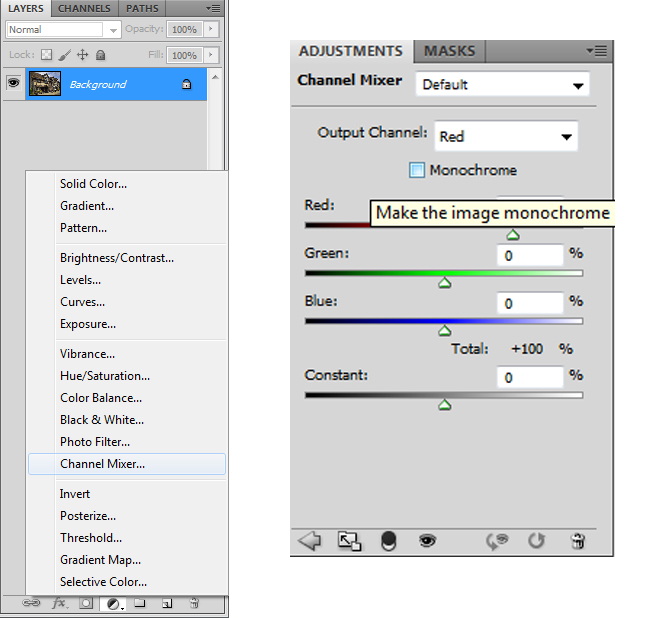
Step 2 - Applying Percentages
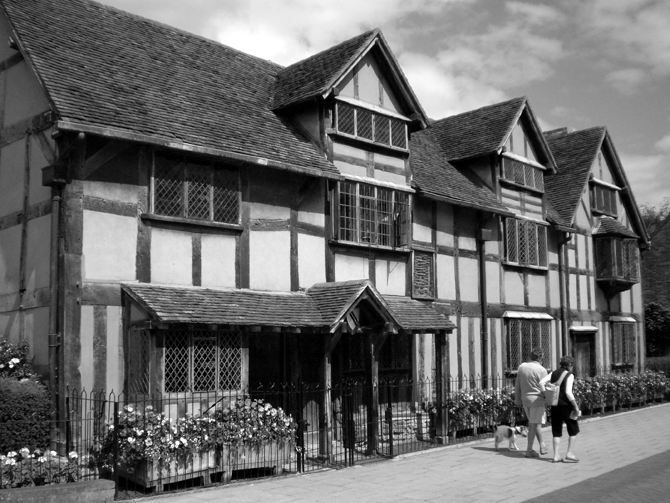
The image is currently in black and white but it doesn't look that good. So let's adjust the RGB percentages. I find that 60-70% for Red, 25-35% for Blue and 0-10% for Red usually works well. For this image, I used the figures 72%, 35% and 3%. Also reduce the Constant slightly. Mine is set at -4.
And that's it really. You have a black and white photograph that looks pretty good. There are some more steps we can do to make the image look even better though.
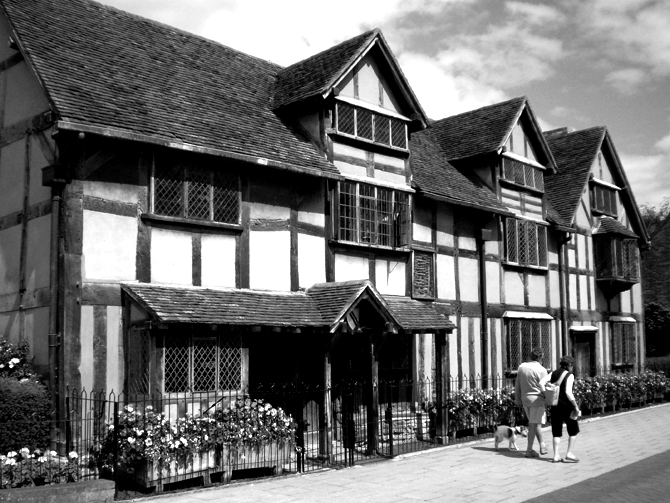
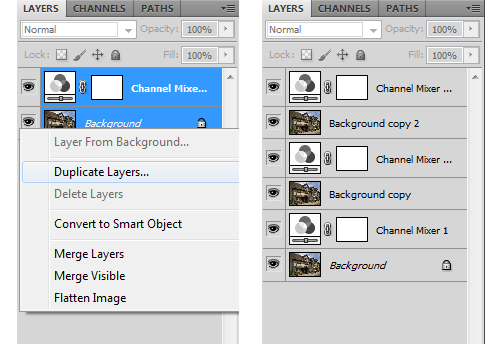
Step 3 - Duplicating Layers and Changing Screen Modes
Start by select both layers and duplicate the layers. You can select both the layers and right-click on them. Then select Duplicate Layers. Or you can drag both selected layers to the Create a new layer icon at the bottom. Do this twice so you should now have 3 sets of layers, all identical.
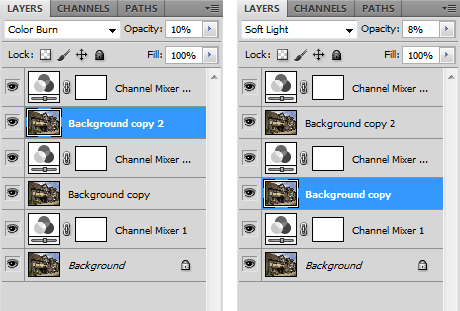
Select the top background layer and change the Screen Mode to Color Burn and change the opacity of the layer to 10%. This will darken the blacks in the image. Then select the next background layer and change the Screen Mode to Soft Light and change the opacity of the layer to 8%. This will lighten the whites in the image, giving the image more contrast.
And that's it really. You can adjust the opacity of these two extra layers to suit your needs. Below are the different stages of the image, from the original to the color mixer changes to the final image. The difference between the steps are clear to see...